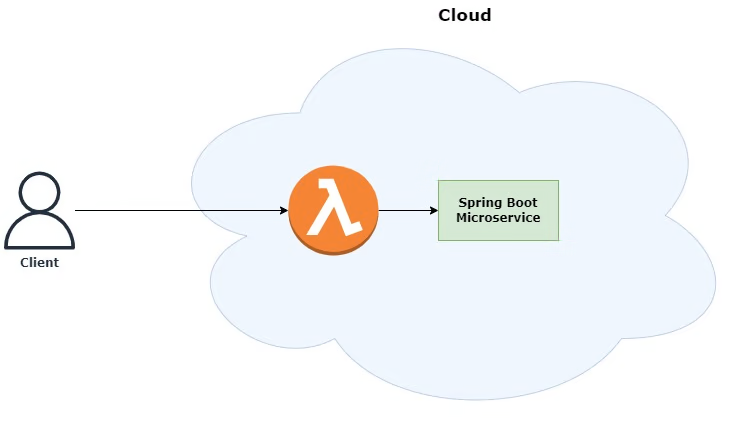
In today’s fast-paced digital world, cloud-native applications are becoming the standard, and serverless microservices are at the forefront of this transformation. By combining the power of Spring Boot with serverless architecture, you can create highly scalable, cost-efficient, and easy-to-manage applications. This article will guide you step-by-step through mastering Spring Boot serverless microservices, with examples and code snippets to elevate your cloud architecture.
Table of Contents
ToggleIntroduction to Serverless Microservices
Serverless microservices are an architectural pattern where individual services are deployed independently, with no need for managing servers. Instead, the cloud provider takes care of scaling, patching, and maintaining the infrastructure, allowing developers to focus purely on code.
Key Benefits of Serverless Microservices:
- Scalability: Automatically scales based on demand.
- Cost-Effective: Only pay for the exact computing time utilized.
- Ease of Maintenance: No need to manage servers or operating systems.

Why Spring Boot Serverless Microservices?
Spring Boot is a popular framework for building Java-based microservices due to its simplicity, speed, and ease of use. When combined with serverless architecture, Spring Boot Serverless Microservices offers several advantages:
- Rapid Development: Spring Boot’s extensive libraries and tools simplify the development process.
- Robust Ecosystem: Seamless integration with Spring Cloud, Spring Security, and other Spring projects.
- Flexibility: Supports a wide range of cloud platforms, including AWS, Azure, and Google Cloud.
Setting Up Your Development Environment
Before getting into code, let’s set up your development environment. Ensure you have the below software installed:
- Java Development Kit: JDK 11 or later.
- Maven or Gradle: For project build and managing dependencies. To learn more about Maven, please read my Maven article.
- Spring Boot CLI (optional): For quickly generating Spring Boot projects.
- AWS CLI: To interact with AWS services.
- IDE: IntelliJ IDEA, Eclipse, or any IDE of your choice.
Step-by-Step Environment Setup:
Install JDK:
sudo apt install openjdk-11-jdkInstall Maven:
sudo apt install mavenInstall Spring Boot CLI (Optional):
sudo apt install springboot-cliCreating Your First Spring Boot Serverless Microservices
Now that your environment is set up, let’s create a simple Spring Boot application that can be deployed as a serverless microservice.
Step 1: Create a Spring Boot Project
Use the Spring Initializr to create a new Spring Boot project. Go to start.spring.io, and generate a project with these details:
- Project: Maven
- Language: Java
- Spring Boot: 3.0.0 (or the latest version)
- Group: com.serverlessdemo
- Artifact: serverless-microservice
- Dependencies: Spring Web, Spring Cloud Function, Spring Boot Actuator
Download the project and extract it to your preferred directory.
Step 2: Define the Microservice Logic
In the generated project, create a simple microservice that handles HTTP requests. Create a new class GreetingService.java in the src/main/java/com/ serverlessdemo /serverlessmicroservice directory.
package com.serverlessdemo.serverlessmicroservice;
import org.springframework.stereotype.Service;

@Service
public class GreetingService {
    public String greet(String name) {
        return "Hello, " + name + "! Welcome to Spring Boot Serverless Microservices.";
    }

}
Next, create a controller GreetingController.java to expose the service as an HTTP endpoint.
import org.springframework.web.bind.annotation.GetMapping;
import org.springframework.web.bind.annotation.RequestParam;
import org.springframework.web.bind.annotation.RestController;

@RestController
public class GreetingController {

    private final GreetingService greetingService;
    public GreetingController(GreetingService greetingService) {
        this.greetingService = greetingService;
    }

    @GetMapping("/greet")
    public String hello(@RequestParam(value = "name", defaultValue = "World") String name) {
        return greetingService.greet(name);
    }
}
Step 3: Build the Project
Go to the project directory and build the project using Maven:
mvn clean installDeploying Spring Boot Serverless Microservices on AWS Lambda
AWS Lambda is a popular serverless computing service that automatically manages the infrastructure for your Spring Boot microservices.
Step 1: Add AWS Lambda Dependency
To deploy your Spring Boot application on AWS Lambda, add the following dependency to your pom.xml:
<dependency>
    <groupId>org.springframework.cloud</groupId>
    <artifactId>spring-cloud-function-adapter-aws</artifactId>
    <version>3.2.3</version>
</dependency>
Step 2: Configure AWS Lambda Handler
Create a new class LambdaHandler.java in the src/main/java/com/example/serverlessmicroservice directory:
package com.serverlessdemo.serverlessmicroservice;

import org.springframework.cloud.function.adapter.aws.SpringBootRequestHandler;

public class LambdaHandler extends SpringBootRequestHandler<String, String> {

}
This class will serve as the entry point for AWS Lambda to invoke your Spring Boot application.
Step 3: Package and Deploy
Package the application as a JAR file:
mvn packageNext, deploy the packaged JAR file to AWS Lambda using the AWS CLI or the AWS Management Console. You will need to create a new Lambda function and upload the JAR file as the function’s code.
Testing and Monitoring Serverless Microservices
Once deployed, you can test your serverless microservice by invoking the AWS Lambda function or using API Gateway to expose it as a RESTful API.
Testing via AWS CLI:
aws lambda invoke --function-name my-function --payload '{"name": "Aneesh"}' response.jsonMonitoring: AWS provides built-in monitoring tools like CloudWatch to monitor your Lambda function’s performance, logs, and errors.
Best Practices for Spring Boot Serverless Microservices
- Cold Start Optimization: Minimize startup time by reducing dependencies and using AWS Lambda’s Provisioned Concurrency.
- Security: Use AWS IAM roles to manage permissions and secure your Lambda functions.
- Logging and Monitoring: Leverage tools like AWS CloudWatch and AWS X-Ray for detailed logging and tracing.
- Configuration Management: Use AWS Parameter Store or Secrets Manager to manage configuration settings securely.
Conclusion
Mastering Spring Boot serverless microservices can significantly elevate your cloud architecture by providing scalability, cost efficiency, and ease of maintenance. With the step-by-step guide provided in this article, you’re well-equipped to start building and deploying serverless microservices using Spring Boot. By following best practices, you can ensure your applications are secure, performant, and resilient in the cloud.
Whether you’re new to serverless microservices or an experienced developer, Spring Boot Serverless Microservices offers a powerful toolkit for modern cloud-native applications. Start experimenting today, and take your cloud architecture to the next level!

