


As a frontend developer, you’re probably no stranger to the frustrations of dealing with slow or non-existent backend APIs during development. But what if I told you there’s a way to speed up your frontend development cycle and make your life easier? Enter JSON Server, a lightweight, open-source tool that provides mock REST APIs for testing and development purposes.
In this article, we’ll explore how JSON Server can revolutionize your frontend development workflow, provide a step-by-step guide on setting it up, and demonstrate some practical use cases in Node.js. By the end of this tutorial, you’ll be equipped with the knowledge to supercharge your frontend dev cycle and become more productive.
What is JSON Server?
JSON Server is a small, yet powerful tool that allows you to create mock REST APIs for testing and development purposes. It’s designed to mimic real-world APIs, making it an ideal solution for frontend developers who need to test their applications without waiting for backend implementations. With JSON Server, you can quickly create mock data sources, implement API endpoints, and even simulate server-side logic. This means you can focus on building your frontend application without worrying about the slow or non-existent backend API holding you back.
Benefits of Using JSON Server
So, what are the benefits of using JSON Server? Here are just a few:
1. Faster Development Cycle: With JSON Server, you can quickly create mock APIs and test your frontend application without waiting for backend implementations.
2. Improved Productivity: By reducing the time spent on waiting for backend APIs, you’ll have more time to focus on building features and improving your overall productivity.
3. Reduced Friction: JSON Server eliminates friction between frontend and backend development teams by providing a shared understanding of API endpoints and data formats.
Setting Up JSON Server
Now that we’ve covered the benefits of using JSON Server, let’s dive into setting it up. Here are the step-by-step instructions:
Step 1: Install Node.js
JSON Server requires Node.js to run, so ensure you install it on your machine.
- Check if Node.js is already installed: Run `node -v` in your terminal/command prompt to check the version of Node.js.

- Install Node.js: If Node.js is not installed, download and install it from the official website.

Step 2: Install JSON Server
Once you have Node.js installed, run the following command in your terminal/command prompt to install JSON Server:
npm install -g json-server
Step 3: Create a New Project Folder
Create a new folder for your project and navigate into it.
Create a new folder: Use your file explorer/file system to create a new folder. For this example, let’s call the folder “my-app”.
Step 4: Initialize a New Node.js Project
Run `npm init` in your terminal/command prompt to initialize a new Node.js project:
npm init -y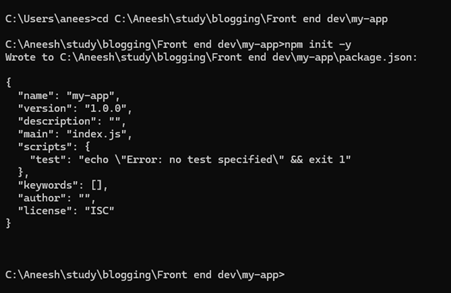
This will create a `package.json` file that contains metadata about your project.
Step 5: Create a JSON Server Configuration File
Create a new file called `db.json` (or any other name you prefer) in the root of your project folder. This file will serve as our mock data source:
{
"posts": [
{ "id": 1, "title": "Post 1", "content": "This is post 1." },
{ "id": 2, "title": "Post 2", "content": "This is post 2." }
],
"comments": []
}
In this example, we have a `posts` array with two objects and an empty `comments` array.
Step 6: Run JSON Server
Now that you have your mock data source set up, run the following command to start JSON Server:
json-server db.jsonJSON Server will listen on port 3000 by default. You can access it in your web browser at `http://localhost:3000`.
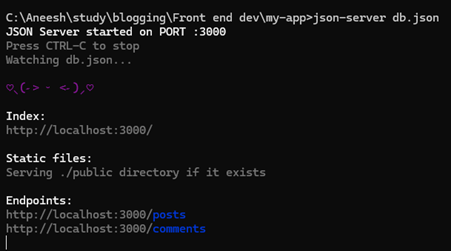

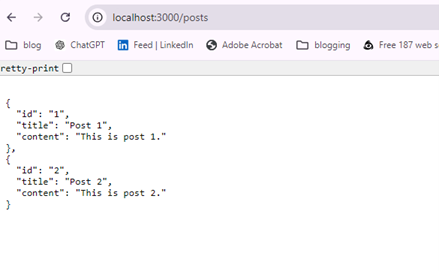
If you click /post then you will get all the data and this is ‘GET’ method for this resource. json-server tool creates endpoints based on the data provided in db.json. As we have provided ‘posts’ and ‘comments’ list in JSON file and hence endpoints for these 2 resources have created.
Json-server provide CRUD operations for a resource. Lets try to add a post object using ‘POST’ method

Now let’s try ‘GET’ method and see if this data can be retrieved.

Here we can see data is persisted by json-server. Cool right!! We didn’t even write any logic or use any DB to store the data.
We can call other CRUD operations also
Step 7: Test Your Frontend Application
With JSON Server running, you can now test your front-end application without waiting for backend implementations.
For example, if you’re building a simple blog application and want to display a list of posts, you can use the following URL in your javascript frontend code:
fetch('http://localhost:3000/posts')
.then(response => response.json())
.then(data => console.log(data));
This will fetch the `posts` array from JSON Server and log it to the console.
Use Cases with Node.js
Now that you’ve seen how to set up JSON Server, let’s explore some practical use cases in Node.js:
1. Mocking API Endpoints: With JSON Server, you can quickly create mock API endpoints for testing and development purposes.
2. Simulating Server-Side Logic: JSON Server allows you to implement server-side logic, making it easier to test complex scenarios.
For example, let’s say you’re building a simple web application that requires user authentication. You can use JSON Server to simulate the backend API calls required for authentication:
fetch('http://localhost:3000/login', {
method: 'POST',
headers: { 'Content-Type': 'application/json' },
body: JSON.stringify({ username: 'john_doe', password: 'password123' }),
})
.then(response => response.json())
.then(data => console.log(data));
In this example, we’re simulating a login request to the `login` endpoint of our backend API.
Conclusion
JSON Server is an incredibly powerful tool for speeding up your front-end development cycle. By providing mock REST APIs and simulating server-side logic, you can quickly test and iterate on your front-end application without waiting for backend implementations.
In this article, we’ve covered the benefits of using JSON Server, followed a step-by-step guide to setting it up, and demonstrated some practical use cases in Node.js.
Whether you’re building a simple web application or a complex enterprise-level system, JSON Server is an essential tool to help you become more productive and efficient as a front-end developer. So why not give it a try today?